|
| |
 |
 |
 |
 |
 |
 |
 |
|
| |
01.
Account Creation
|
02.
Vehicle Registration
|
03.
Dash Camera Connection
Method 1. App with Wi-Fi
Method 2. PC Viewer
|
04.
Connection Complete
|
|
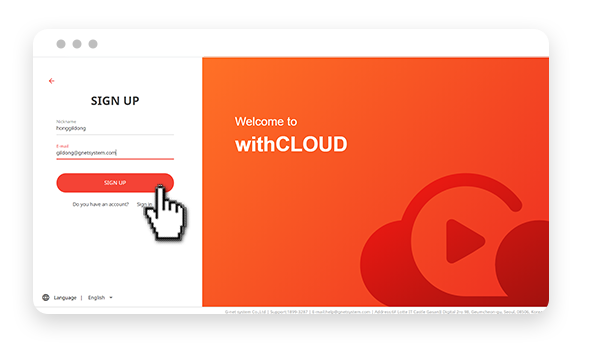 |
01-2
A verification link to your email address will be sent. Click the link, insert your information, click the confirm button after agreeing to the terms and conditions.
|
|
|
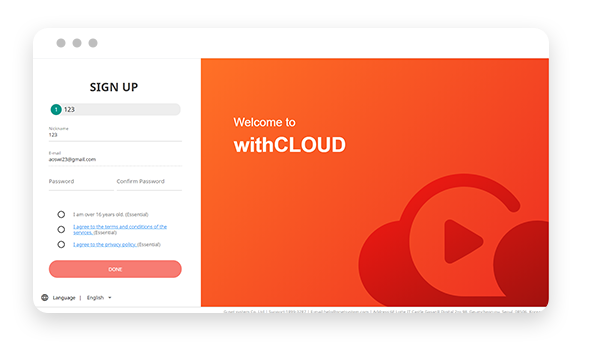 |
[Easy Login]
If you press the Easy Login(SNS icon) at the bottom
of the log-in screen, you will go directly to
the membership sign-up screen without sending a link.

|
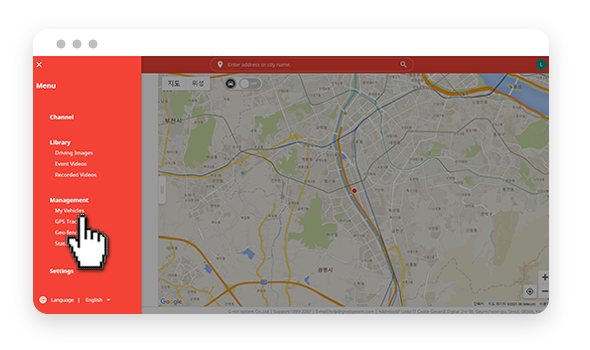 |
02-1
After log in, click the icon of the [Menu] at the top left of the main screen, select [Management - My Vehicle]
|
|
|
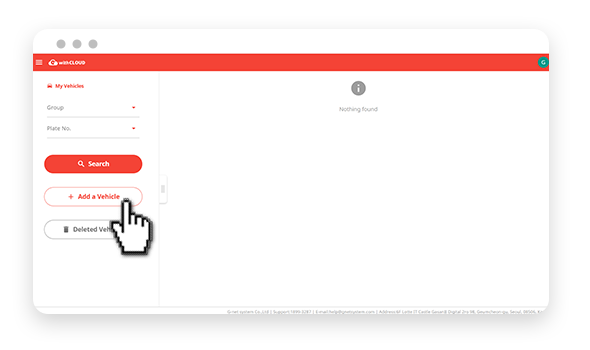 |
02-2
Select [Add a Vehicle]
|
|
|
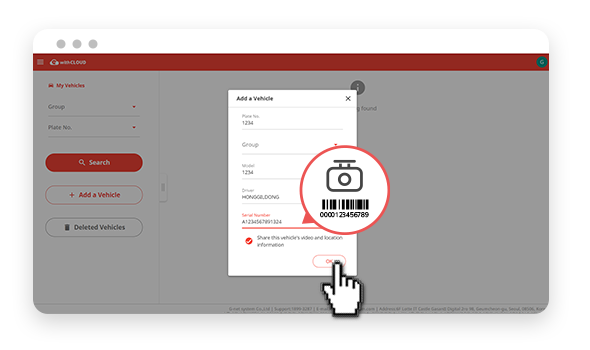 |
02-3
Fill out vehicle information and select [OK] button.
|
|
※ Verify serial number at the bottom of the dash camera is the same.
|
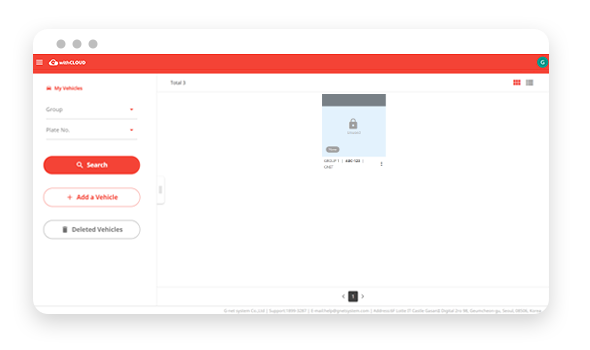 |
02-4
Vehicle Registration Complete.
|
|
|
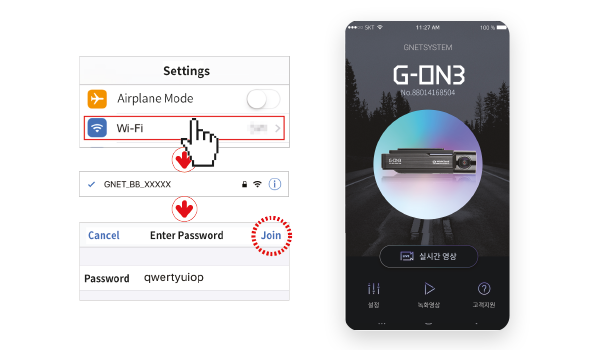 |
03-Method 1(iOS)-1
Select a network starting with [WiFi Settings] ‘GNET_BB’ in standby for registration. Enter the Wi-Fi password 'qwertyuiop'. When running the GNET app, “Registration Complete” voice guidance is output.
|
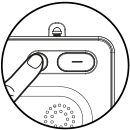 |
Power button on the dash camera, Press for twice,
one second at a time. "Waiting for registration"
voice guidance is output. |
|
 |
03-Method 1(iOS)-2
Select [Settings] on the main screen Cloud use [ON], after entering the router's SSID and password. After clicking the [Back] button, click [YES] in the pop-up to complete the registration.
|
|
|
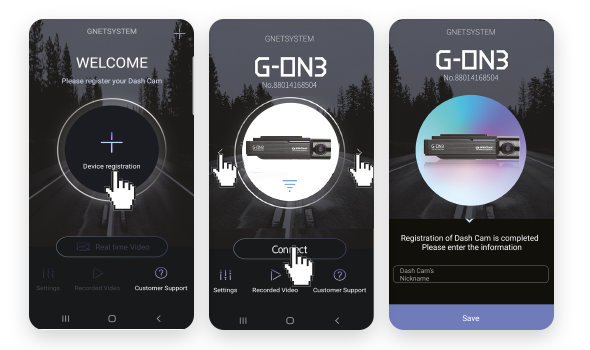 |
03-Method 1(Android)-1
Run GNET apps while waiting for registration Select [Device Registration] in the center of the screen, select the device and then [Connect]. After confirming the voice guidance “Registration completed” , input device information and [Save]
|
|
Power button on the dash camera, Press for twice,
one second at a time. "Waiting for registration"
voice guidance is output. |
|
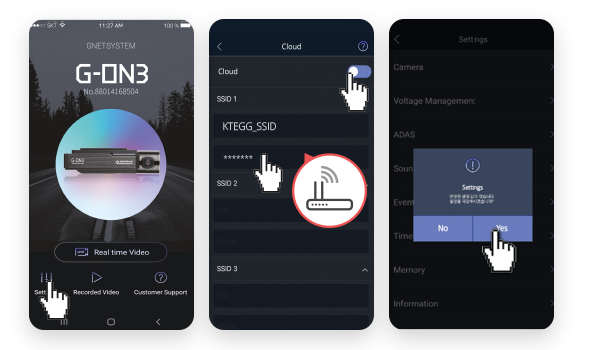 |
03-Method 1(Android)-2
Select [Settings] on the main screen Cloud use [ON], after entering the router's SSID and password. After clicking the [Back] button, click [YES] in the pop-up to complete the registration.
|
|
|
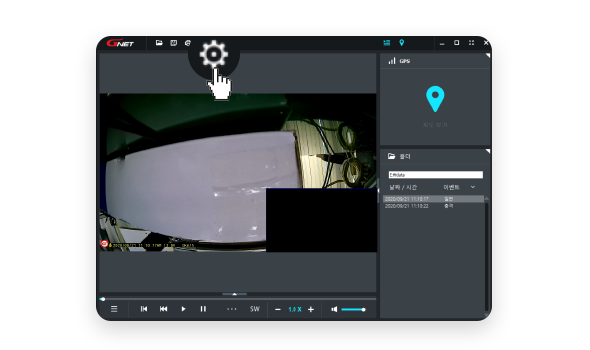 |
03-Method 2(PC Viewer)-1
Insert your micro SD card in the computer. Execute “GNET PC VIEWER” and open the SD memory file. Click the [Setting] icon on the tool-box.
|
|
|
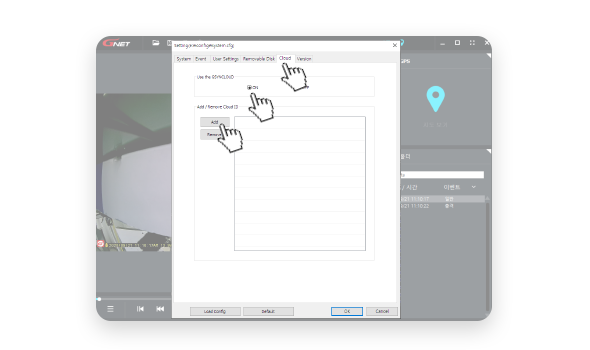 |
03-Method 2(PC Viewer)-2
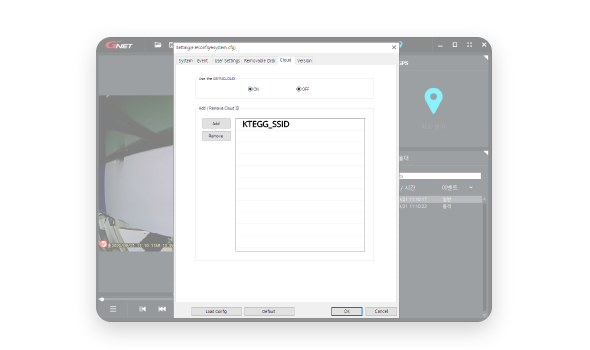
[Cloud] - [Use the withCLOUD] - select [on] [Add/ Remove Cloud ID] - [Add]
|
|
|
 |
03-Method 2(PC Viewer)-3
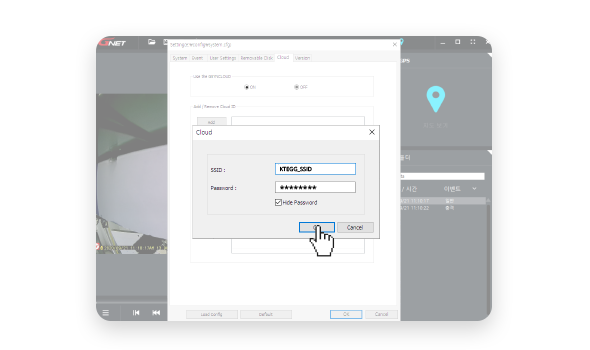
Enter your SSID and password to popup screen and tap [OK] button.
|
|
|
 |
03-Method 2(PC Viewer)-4
Select [Settings] on the main screen Cloud use [ON], after entering the router's SSID and password. After clicking the [Back] button, click [YES] in the pop-up to complete the registration.
|
|
※ When entering SSID and password, enter case sensitive.
|
 |
03-Method 2(PC Viewer)-5
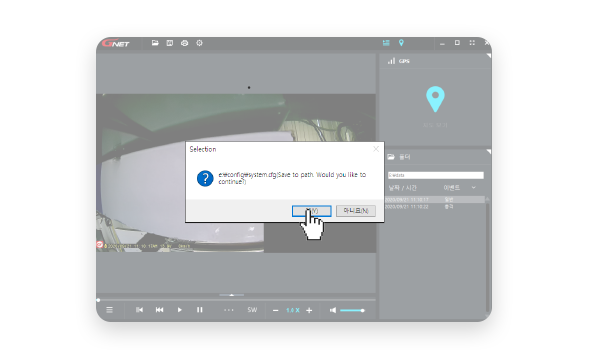
Save the settings. Put the micro SD card back to the dash camera and power on.
|
|
|
 |
04-1
If the dash camera is connected with [withCLOUD], "Cloud is connected" Voice guidance is output
|
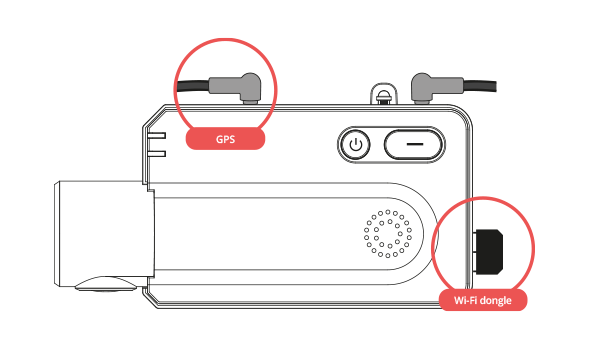
- withCLOUD is available when WiFi dongle and GPS are working.
- It can be disable if connection is unstable.
- GNET app in cloud mode, it cannot be used.
- To switch Wifi/Cloud mode, press the Wi-Fi button for 5-6 seconds.
|
 |
04-2
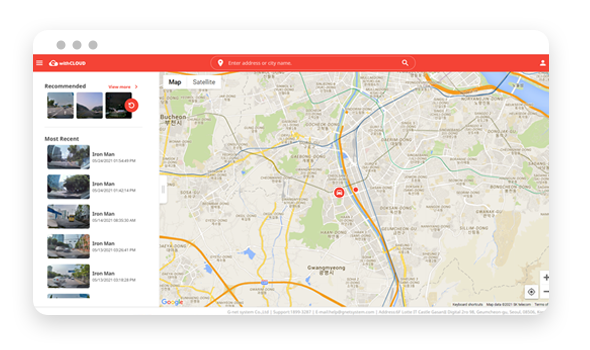
The withCLOUD connection is complete.
|
- If the connection is unstable, withCLOUD may not be available.
|
|